Unlock the full potential of your website with Amazon Route 53, the ultimate DNS and domain management solution from AWS. Whether you’re launching a blog, scaling an e-commerce empire, or building a global app, Route 53 ensures your users find you—fast, secure, and reliable. This beginner’s guide to Amazon Route 53 (updated for 2025) walks you through every step, from registering domains to advanced traffic routing, with clear instructions, real-world examples, and SEO-optimized visuals to make DNS a breeze.
Why master Route 53? It’s not just about pointing domains to servers—it’s about controlling your web presence with precision, speed, and scalability. Ready to dominate DNS like a pro? Let’s dive into the best Amazon Route 53 tutorial for beginners and beyond!
Table of contents [Show]
- What is Amazon Route 53? Your DNS Powerhouse Explained
- Prerequisites for Getting Started with Route 53
- Step 1: Register or Connect Your Domain—Build Your Brand
- Step 2: Understand Hosted Zones—Your DNS Control Room
- Step 3: Configure DNS Records—Route Traffic with Precision
- Step 4: Test Your DNS Setup—Avoid Downtime
- Step 5: Advanced Routing Policies—Control Traffic Like a Pro
- Real-Life Example: Host a Secure Static Website
- Advanced Pro Tips for Route 53 Mastery
- Why Route 53 is Essential in 2025
- Start Your Route 53 Journey Today
What is Amazon Route 53? Your DNS Powerhouse Explained
Amazon Route 53 is AWS’s cloud-based DNS service that translates domain names (e.g., yourwebsite.com) into IP addresses (e.g., 192.0.2.1). But it’s more than a DNS resolver—it’s a scalable, secure platform for domain registration, traffic routing, and high availability. Key features include:
- Domain Registration: Buy and manage domains directly in AWS.
- Global Traffic Routing: Direct users to the fastest servers worldwide.
- Intelligent Policies: Route based on latency, location, or weights.
- Health Checks & Failover: Ensure 100% uptime with auto-recovery.
- AWS Integration: Seamless with S3, CloudFront, EC2, and Lambda.
Why “Route 53”? DNS operates on port 53, making it the “route” to your digital world.
By mastering Route 53, you’ll learn how to set up DNS for websites, manage domains efficiently, and even host a secure static site—all in one guide.

Prerequisites for Getting Started with Route 53
No advanced skills needed! Here’s what you’ll need to follow this Route 53 beginner’s guide:
- AWS Account: Sign up at aws.amazon.com. Enable billing (Route 53 costs ~$0.50/month per hosted zone + ~$12–$15/year for domains).
- Domain Name: Register via Route 53 or use one from Namecheap, GoDaddy, or other registrars.
- Basic Web Concepts: Know terms like “IP address” or “subdomain”? Great, but I’ll explain everything.
- Eagerness to Learn: This guide makes DNS approachable for all!
Step 1: Register or Connect Your Domain—Build Your Brand
Your domain (e.g., mywebsite.com) is your online identity. Route 53 simplifies domain registration and DNS setup for new or existing domains. Here’s how to get started.
Option A: Register a New Domain with Route 53
- Navigate to Route 53: In the AWS Console, go to Route 53 > Domains > Register Domain.
- Search Domains: Enter a unique name (e.g.,
mygreatsite.com) and check availability. - Buy It: Add to cart, provide contact info, and purchase (expect ~$12–$15/year for
.com). - Automatic Setup: Route 53 creates a Hosted Zone with default DNS records—ready to configure!
Option B: Connect an Existing Domain
- Create a Hosted Zone: Go to Route 53 > Hosted Zones > Create Hosted Zone. Input your domain (e.g.,
yourdomain.com) and select Public Hosted Zone. - Copy Name Servers: Route 53 generates 4 Name Server (NS) records (e.g.,
ns-123.awsdns-45.com). Copy them. - Update Registrar: Log in to your registrar (e.g., Namecheap), find DNS settings, and replace existing NS records with Route 53’s.
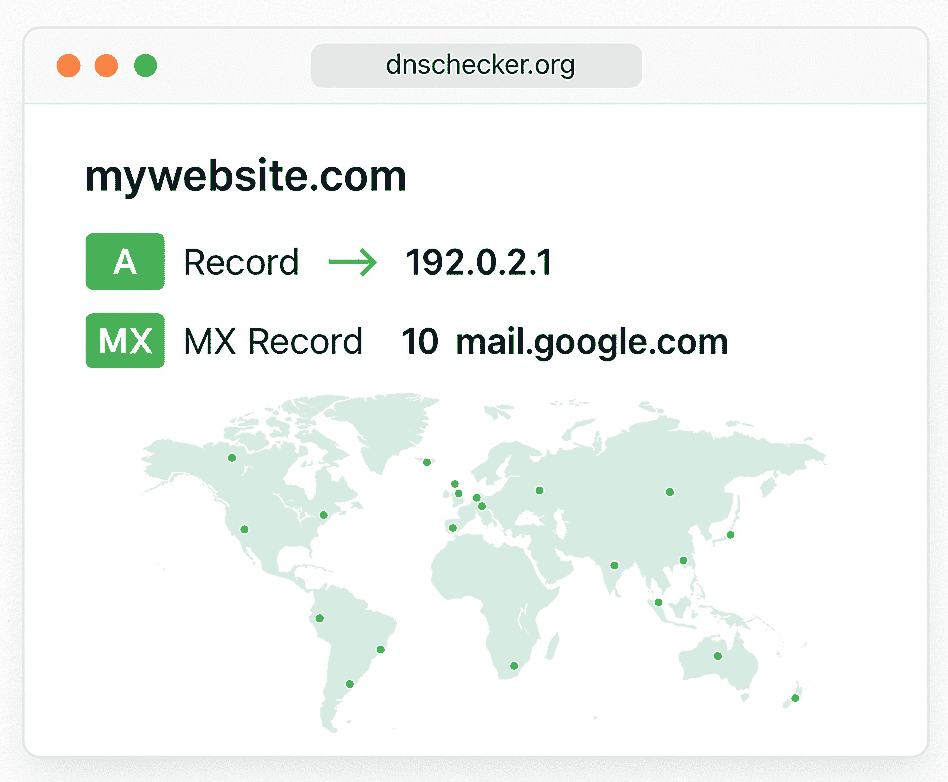
- Wait for Propagation: DNS changes take 24–48 hours globally. Use dnschecker.org to track progress.

SEO Tip: Add DNSSEC (Domain Name System Security Extensions) to your domain for enhanced security and search trust signals. Enable it in Route 53 under Domains > DNSSEC.
Step 2: Understand Hosted Zones—Your DNS Control Room
A Hosted Zone is the nerve center of your domain, storing all DNS records that direct traffic. When you create one, Route 53 sets up:
- NS Records: Name servers handling your DNS (e.g.,
ns-123.awsdns-45.com). - SOA Record: Admin metadata, like who manages the domain.
Think of it as a traffic control tower—you’ll add records to guide users to websites, emails, or APIs.

Step 3: Configure DNS Records—Route Traffic with Precision
DNS records are the rules that make your domain functional. They direct web traffic, emails, and more. Here’s a breakdown of essential types for Route 53 DNS setup:
| Record Type | Purpose | Example |
|---|---|---|
| A | Maps domain to IPv4 | yourdomain.com → 192.0.2.1 |
| AAAA | Maps to IPv6 | yourdomain.com → 2001:db8::1 |
| CNAME | Aliases domains | www.yourdomain.com → yourdomain.com |
| MX | Routes email | 10 mail.google.com |
| TXT | Verification/security text | v=spf1 include:_spf.google.com ~all |
| ALIAS | Links to AWS resources | yourdomain.com → s3-website... |
How to Add Records
- Open your Hosted Zone.
- Click Create Record.
- Choose Type (e.g., A, ALIAS).
- Set Name:
@for root orwwwfor subdomains. - Enter Value: IP, domain, or AWS endpoint.
- Set TTL: 300 seconds for testing.
- Save.
Advanced: ALIAS & DNSSEC
- ALIAS Records: Unique to Route 53, they link root domains to AWS services (e.g., S3, CloudFront) faster than CNAMEs.
- DNSSEC: Add cryptographic signatures to prevent DNS spoofing. Enable in Route 53 for trust and SEO benefits.

SEO Tip: Use TXT records for SPF/DKIM to boost email deliverability, signaling reliability to search engines. Link to AWS’s DNS guide for authority: docs.aws.amazon.com/Route53.
Step 4: Test Your DNS Setup—Avoid Downtime
Testing ensures your Route 53 DNS configuration works flawlessly. Use these tools to verify:
- Online Tools:
- dnschecker.org: Checks A, CNAME, MX, TXT globally.
- mxtoolbox.com: Audits DNS and email.
- Command Line:
dig yourdomain.comnslookup yourdomain.com
- Google Admin Toolbox: toolbox.googleapps.com.
Checkpoints
- A/CNAME: Correct IPs/domains?
- MX/TXT: Email/verification live?
- TTL: Changes propagated? (300s TTL = faster updates.)
Step 5: Advanced Routing Policies—Control Traffic Like a Pro
Route 53’s routing policies let you direct traffic intelligently. From basic setups to global architectures, here’s how to shine:
| Policy | Purpose | Use Case |
|---|---|---|
| Simple | Single resource | Blogs, portfolios |
| Latency-based | Lowest-latency server | E-commerce, gaming |
| Weighted | Traffic split by % | A/B testing, load balancing |
| Failover | Backup if primary fails | Mission-critical apps |
| Geolocation | User location-based | Localized content |
| Multi-value | Multiple healthy resources | High availability |
Setup Steps
- Create a record (A, ALIAS).
- Select Routing Policy.
- Configure:
- Weighted: Set weights (e.g., 80% US, 20% EU).
- Failover: Primary + secondary.
- Multi-value: Return up to 8 IPs.
- Add Health Checks for auto-failover.
Advanced: Route 53 ARC
Use Route 53 Application Recovery Controller (ARC) for cross-region failover. It’s ideal for disaster recovery and pairs with health checks for 99.99% uptime.

SEO Tip: Use long-tail keywords like “Route 53 latency-based routing tutorial” in captions to rank for niche searches.
Real-Life Example: Host a Secure Static Website
Build a secure static website with Route 53, S3, CloudFront, and ACM—perfect for blogs, portfolios, or landing pages.
Steps
- S3:
- Create bucket (
mywebsite.com). - Upload HTML/CSS/JS.
- Enable Static Website Hosting.
- Get endpoint (
mywebsite.com.s3-website-us-east-1.amazonaws.com).
- Create bucket (
- Route 53:
- Create Hosted Zone.
- Add ALIAS for
mywebsite.comto S3. - Add CNAME for
www.mywebsite.com.
- CloudFront:
- Create distribution.
- Origin: S3 endpoint.
- Add domains:
mywebsite.com,www.
- ACM:
- Request SSL for
mywebsite.com,*.mywebsite.com. - Validate via DNS.
- Attach to CloudFront.
- Request SSL for
- Route 53 Finalize:
- Update CNAME to CloudFront (
d123456.cloudfront.net). - Optional: ALIAS to CloudFront.
- Update CNAME to CloudFront (
Benefits
- Domains:
mywebsite.com,www.mywebsite.com. - Speed: CloudFront’s global CDN.
- Security: Free HTTPS.
- Cost: ~$0.50/month + usage.

Advanced Pro Tips for Route 53 Mastery
- Low TTL: 300s for testing, 3600s for production.
- CloudWatch: Monitor DNS/health check failures.
- DNSSEC: Enable for security and SEO trust.
- ARC: Use for multi-region resilience.
- Log Changes: Track records for audits.
Why Route 53 is Essential in 2025
Route 53 powers your web presence with:
- Scale: From startups to Netflix.
- Integration: S3, EC2, CloudFront.
- Control: Failover, geolocation, multi-value.
- Trust: Used by Slack, Airbnb.
Start Your Route 53 Journey Today
Master Amazon Route 53 DNS management with these steps:
- Register/connect a domain.
- Configure DNS records.
- Test rigorously.
- Route traffic smartly.
- Build a static site.
Explore more:
Need help? Comment below for Route 53 troubleshooting tips!